

Are you ready for a treat with the Wow effect in a few steps?
Hello friends,
I wish you all well wherever you are. The temperature drops a little bit at night in Socal, feeling the harvest time of the year so I feel alive again. hehe 🙂 , I know it’s a little bit weird, but I totally feel fall is my weather and I feel motivated to do things! So let’s do some mooncakes!
I’ve noticed some of you stop by the egg yolk pastry recipe from last year. I hope that brought you joy! Since it was a well-loved celebration food in my hometown, there even had to be a serious pre-ordering or making long lines for hours to have a famous box of mooncakes. Well, we don’t need it especially since we have to practice social distance in 2020: let’s make mooncakes at home!
You all may know I am huge into gardening so in everything I do I like to refer to flowers. This lotus pastry is inspired by the garden at Balboa Park. One lovely afternoon, we saw the lotus on the pond and it looks so peaceful. This pastry is going to deep fry in the end. But the steps are simpler than the egg yolk pastry. *Note, you can also use this technique to make the crust for egg yolk pastry. I know the previous steps for the crust is a lot of work, so this time, we will make it easier!
24 Lotus pastry, dim: 4×4 cm
Preparation time: 2 hours
For the filling-
720g pre-made lotus seed paste, red bean paste, or other flavors you like are welcome too.
*The ingredients are not common in the western market, I bought mine at a Chinese market, but if you can’t find it, you can make it at home. Here is my old post mention the egg yolks and red bean paste.
*Note: my measurement cup is 240ml for water
For the crust-
Crust layer one:
1 1/8 cup all-purpose flour
1/8 cup bread flour (if you don’t have it, it’s ok to use all-purpose, just will slightly affect the texture.)
1 pinch of salt
45g unsalted butter, room temperature
50g lukewarm water
Crust layer two:
1 cup all-purpose flour
75g unsalted butter, room temperature
Cooking steps:
Simplified puff pastry crust for mooncakes.
- Start with crust layer one. In a big bowl, add the room temperature butter, then sift the flour into the bowl, add water little by little, mix it well with your hands, blend it nicely about 5 mins until it can be formed a big dough with a smooth, shining surface. cover it with plastic wrap for about 30 mins, be careful not to let any air into it to dry it out *Note: adding water slowly, the humidity will affect your flour, some may need more water or vice versa.
- Meanwhile, make crust layer two, in a bowl, sift the flour and add the room temperature butter, mix and blend it well with your hand. it will form a smaller dough than the first one. Make sure there is enough butter, the dough should be well-formed, not crumbling.
- Assemble the two crusts, take the crust layer one dough, Make it a flat big circle with a rolling pin, then put the crust layer two into a smaller circle on top of the crust layer one, wrap it up into a big dough. do not leave any hole or air bubble in it, which will break the layer.
- Using your rolling pan, roll the whole crust into a flat rectangle sheet, then fold it up from the short side to the middle, make it into a smaller rectangle, then fold it up to be a thin rectangle. Again use your rolling pan, roll it into a very flat sheet. Repeat this step 3-4 times. The thinner you roll, the more obviously of layer it comes. cover them fully with plastic wrap for 30 mins after each roll, if the weather you are in is hot and dry, the butter may melt and make a mess. please make sure to cover it well, to prevent the crust from getting dry out.
- Prepare to form filling, shape the lotus seed paste in your hand, you may find it a little bit dry to form the shape. if so, you can put a little bit of olive oil into the palm, take the filling about 30g form it into a ball.
- Take the crust out, divide it into 24 portions. Using the rolling pan rolling it into a round flat circle, you do not need to roll it too flat as previous steps, giving it 3 mm thick is good. add the filling in the center, wrap it up well, make sure there is no hole.
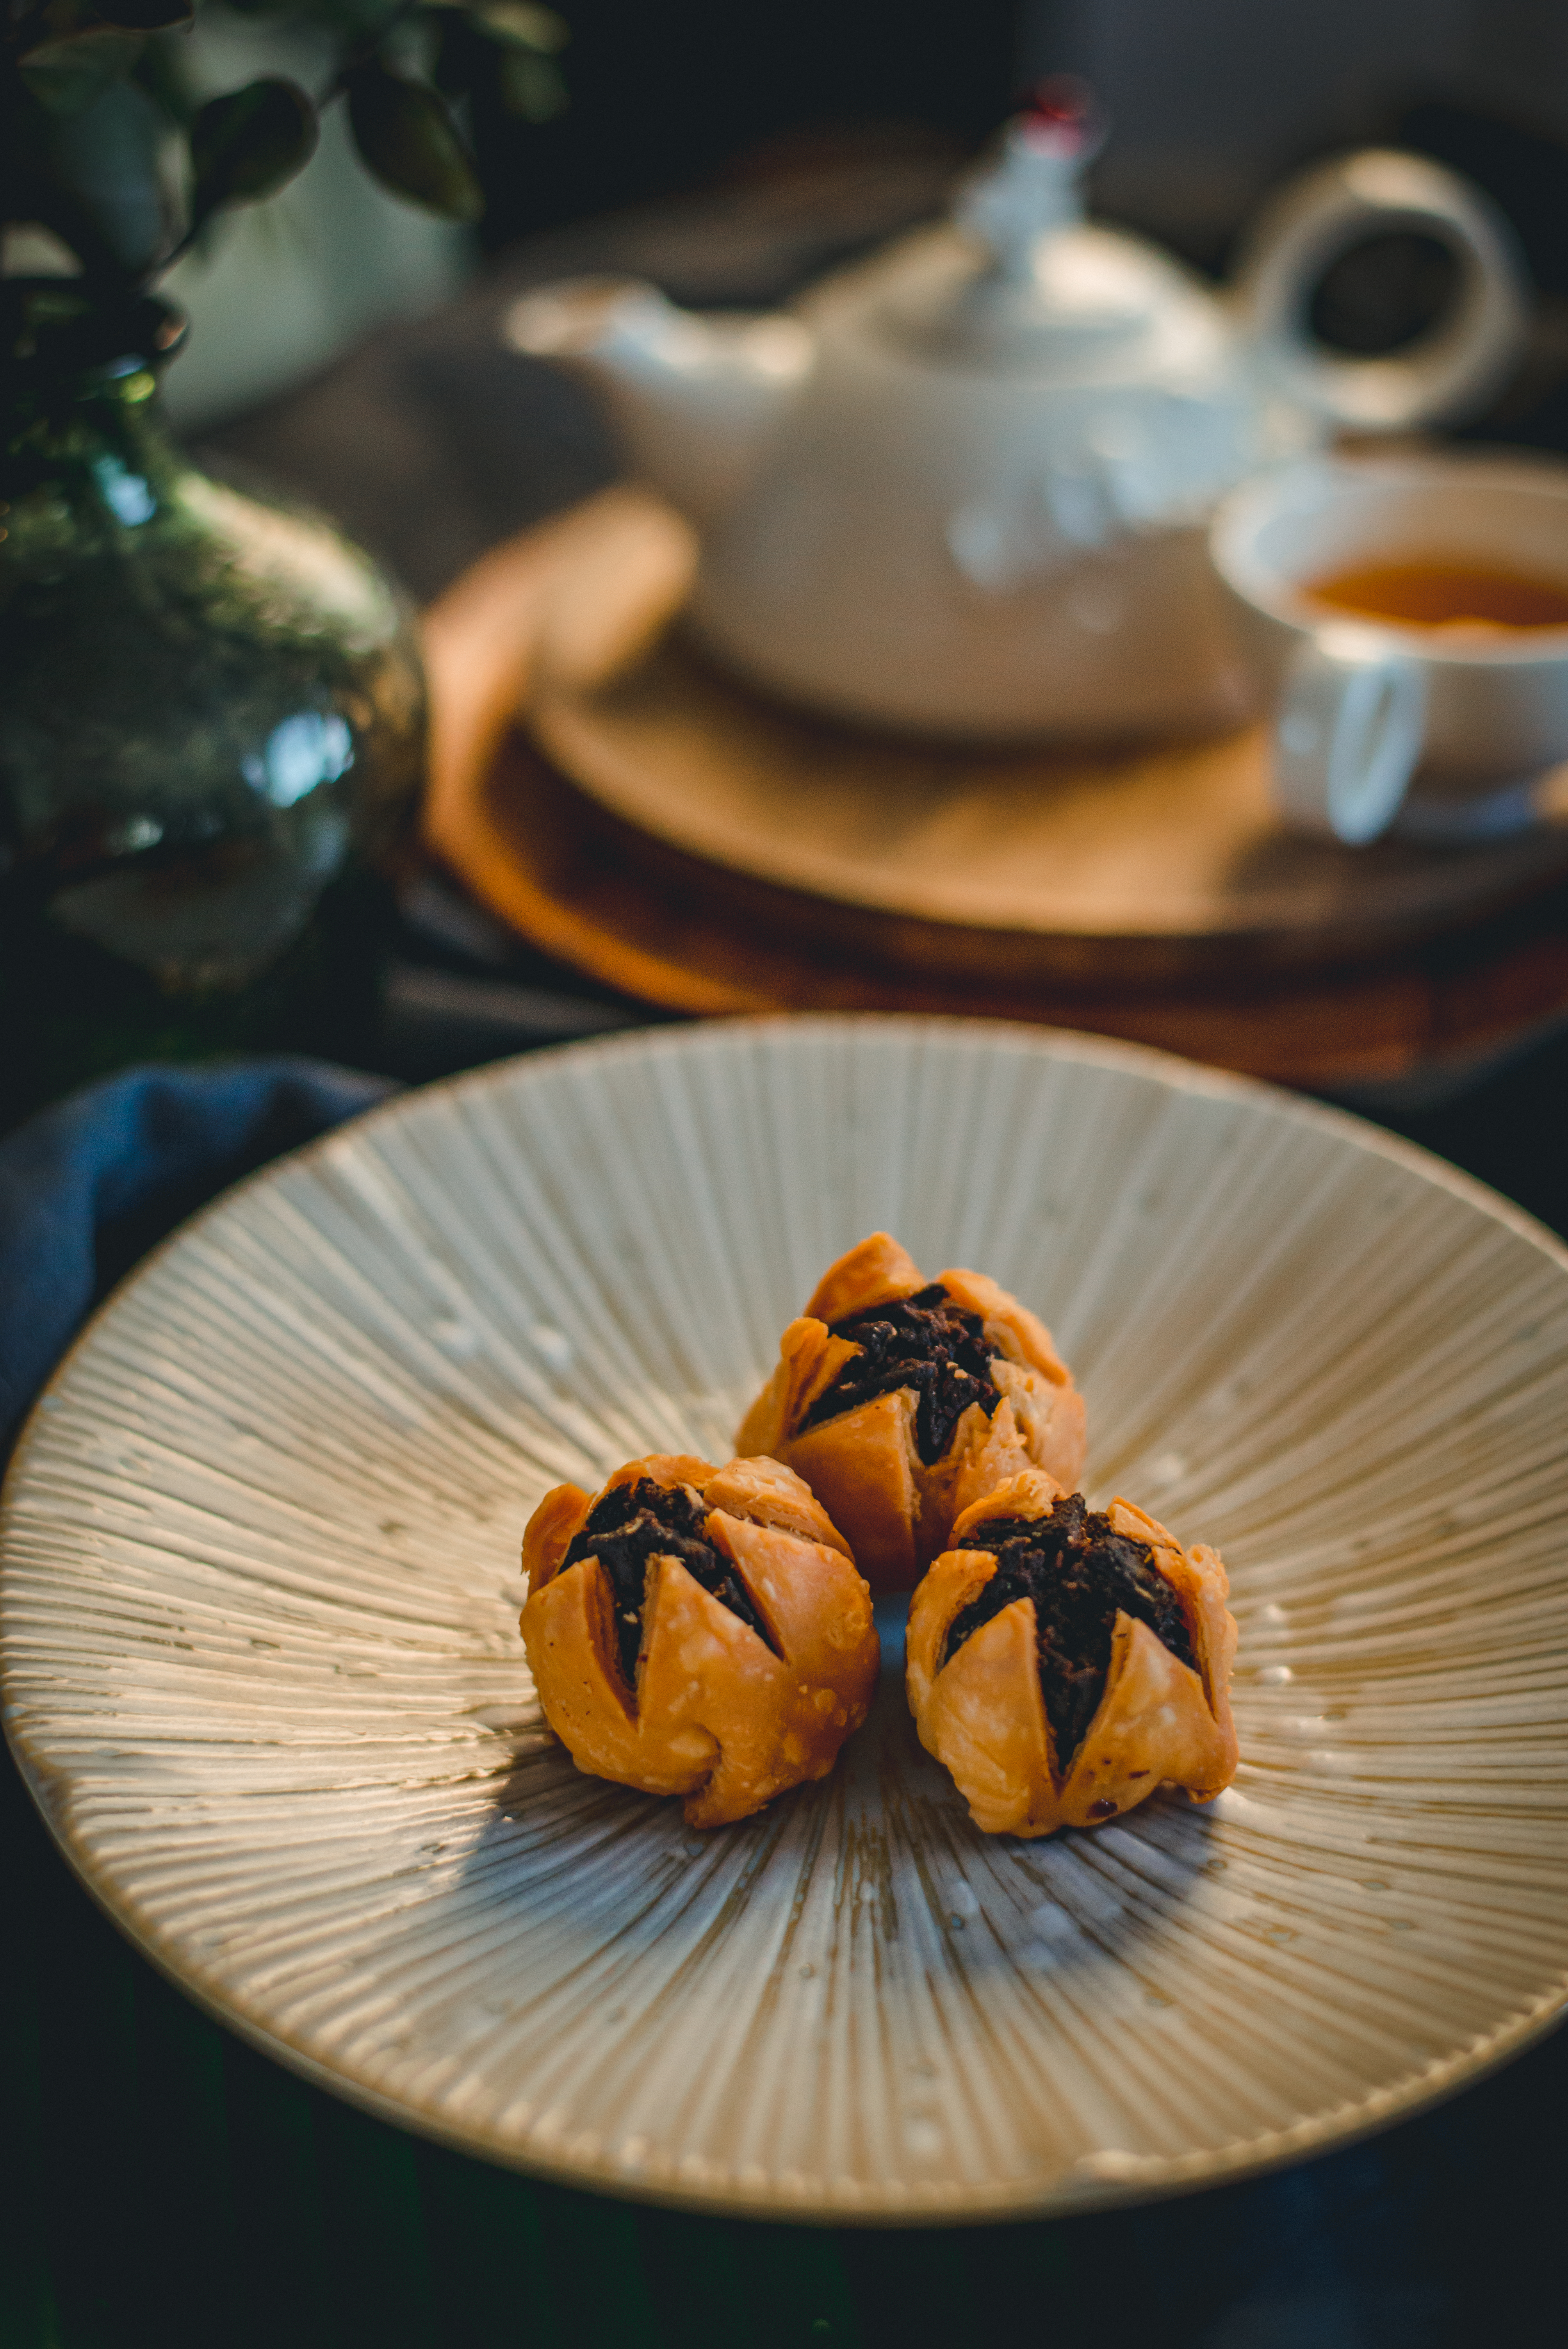
- Before fry it, take one ball into your hand, take a knife cut three lines on top of the crust, every 60 degrees. it will form the petals. only on the crust, do not cut deeply into the filling.
- Now you are ready to deep fry it! prepare your deep fryer or the pan you use for frying, 165C/325F for 20min, or the crust is golden. Only flip it until the top of the shape is sturdy enough. When the crust is golden yellow. take it out and put it on a kitchen paper to absorb the excess oil away. Server them after cooling down. every deep fryer is different, so check it often, do not fry it in a maximum amount in one goal, the pastry will “bloom” getting bigger in the hot oil.

fold in to the middle 
another fold in to the middle 
after twice fold in 
premade mooncake filling from Asian market 
more layers you do, the more bloom you get!


Alright, should we enjoy it together? Prepare a cup of hot tea, the afternoon is full of happiness of harvest, yes, and after working hard for mooncakes, you deserve to enjoy the best!
I found this is so simply beautiful from the look, and the filling is giving the most sweetness, with the fresh fried crunch layer, it works like magic!
When my love saw this, he was wow all the way through, and commenting on it’s so delicious!


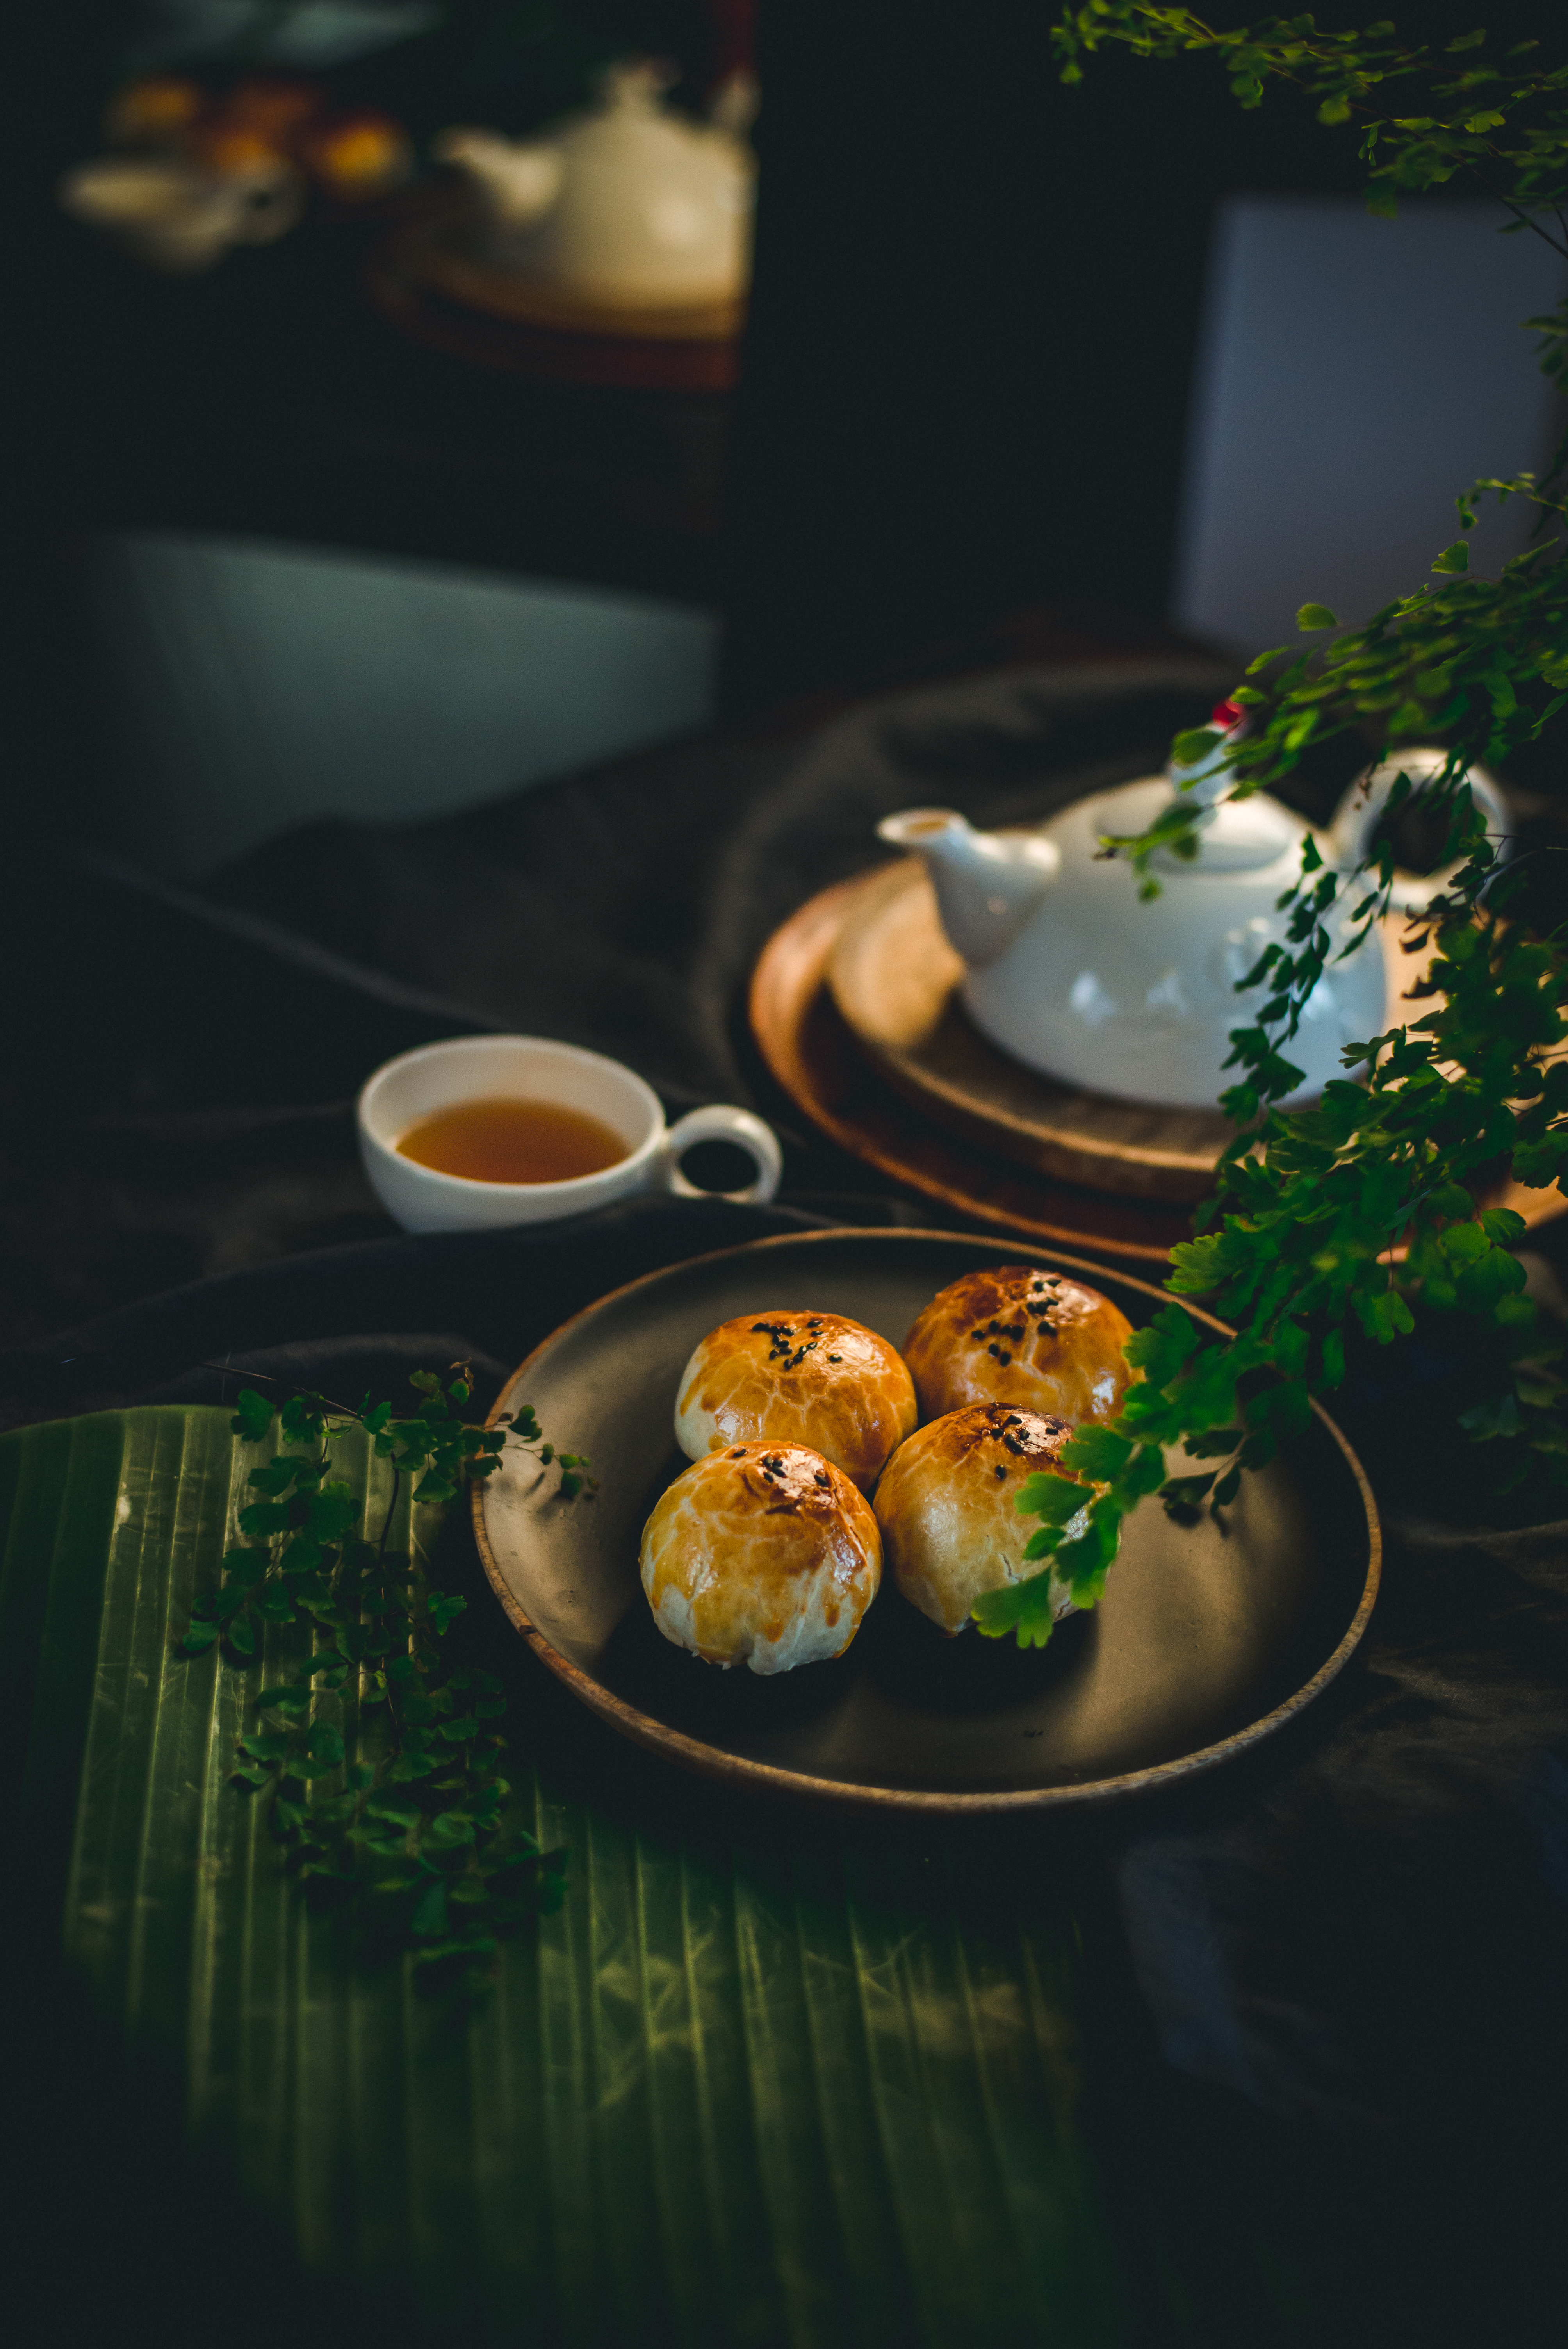
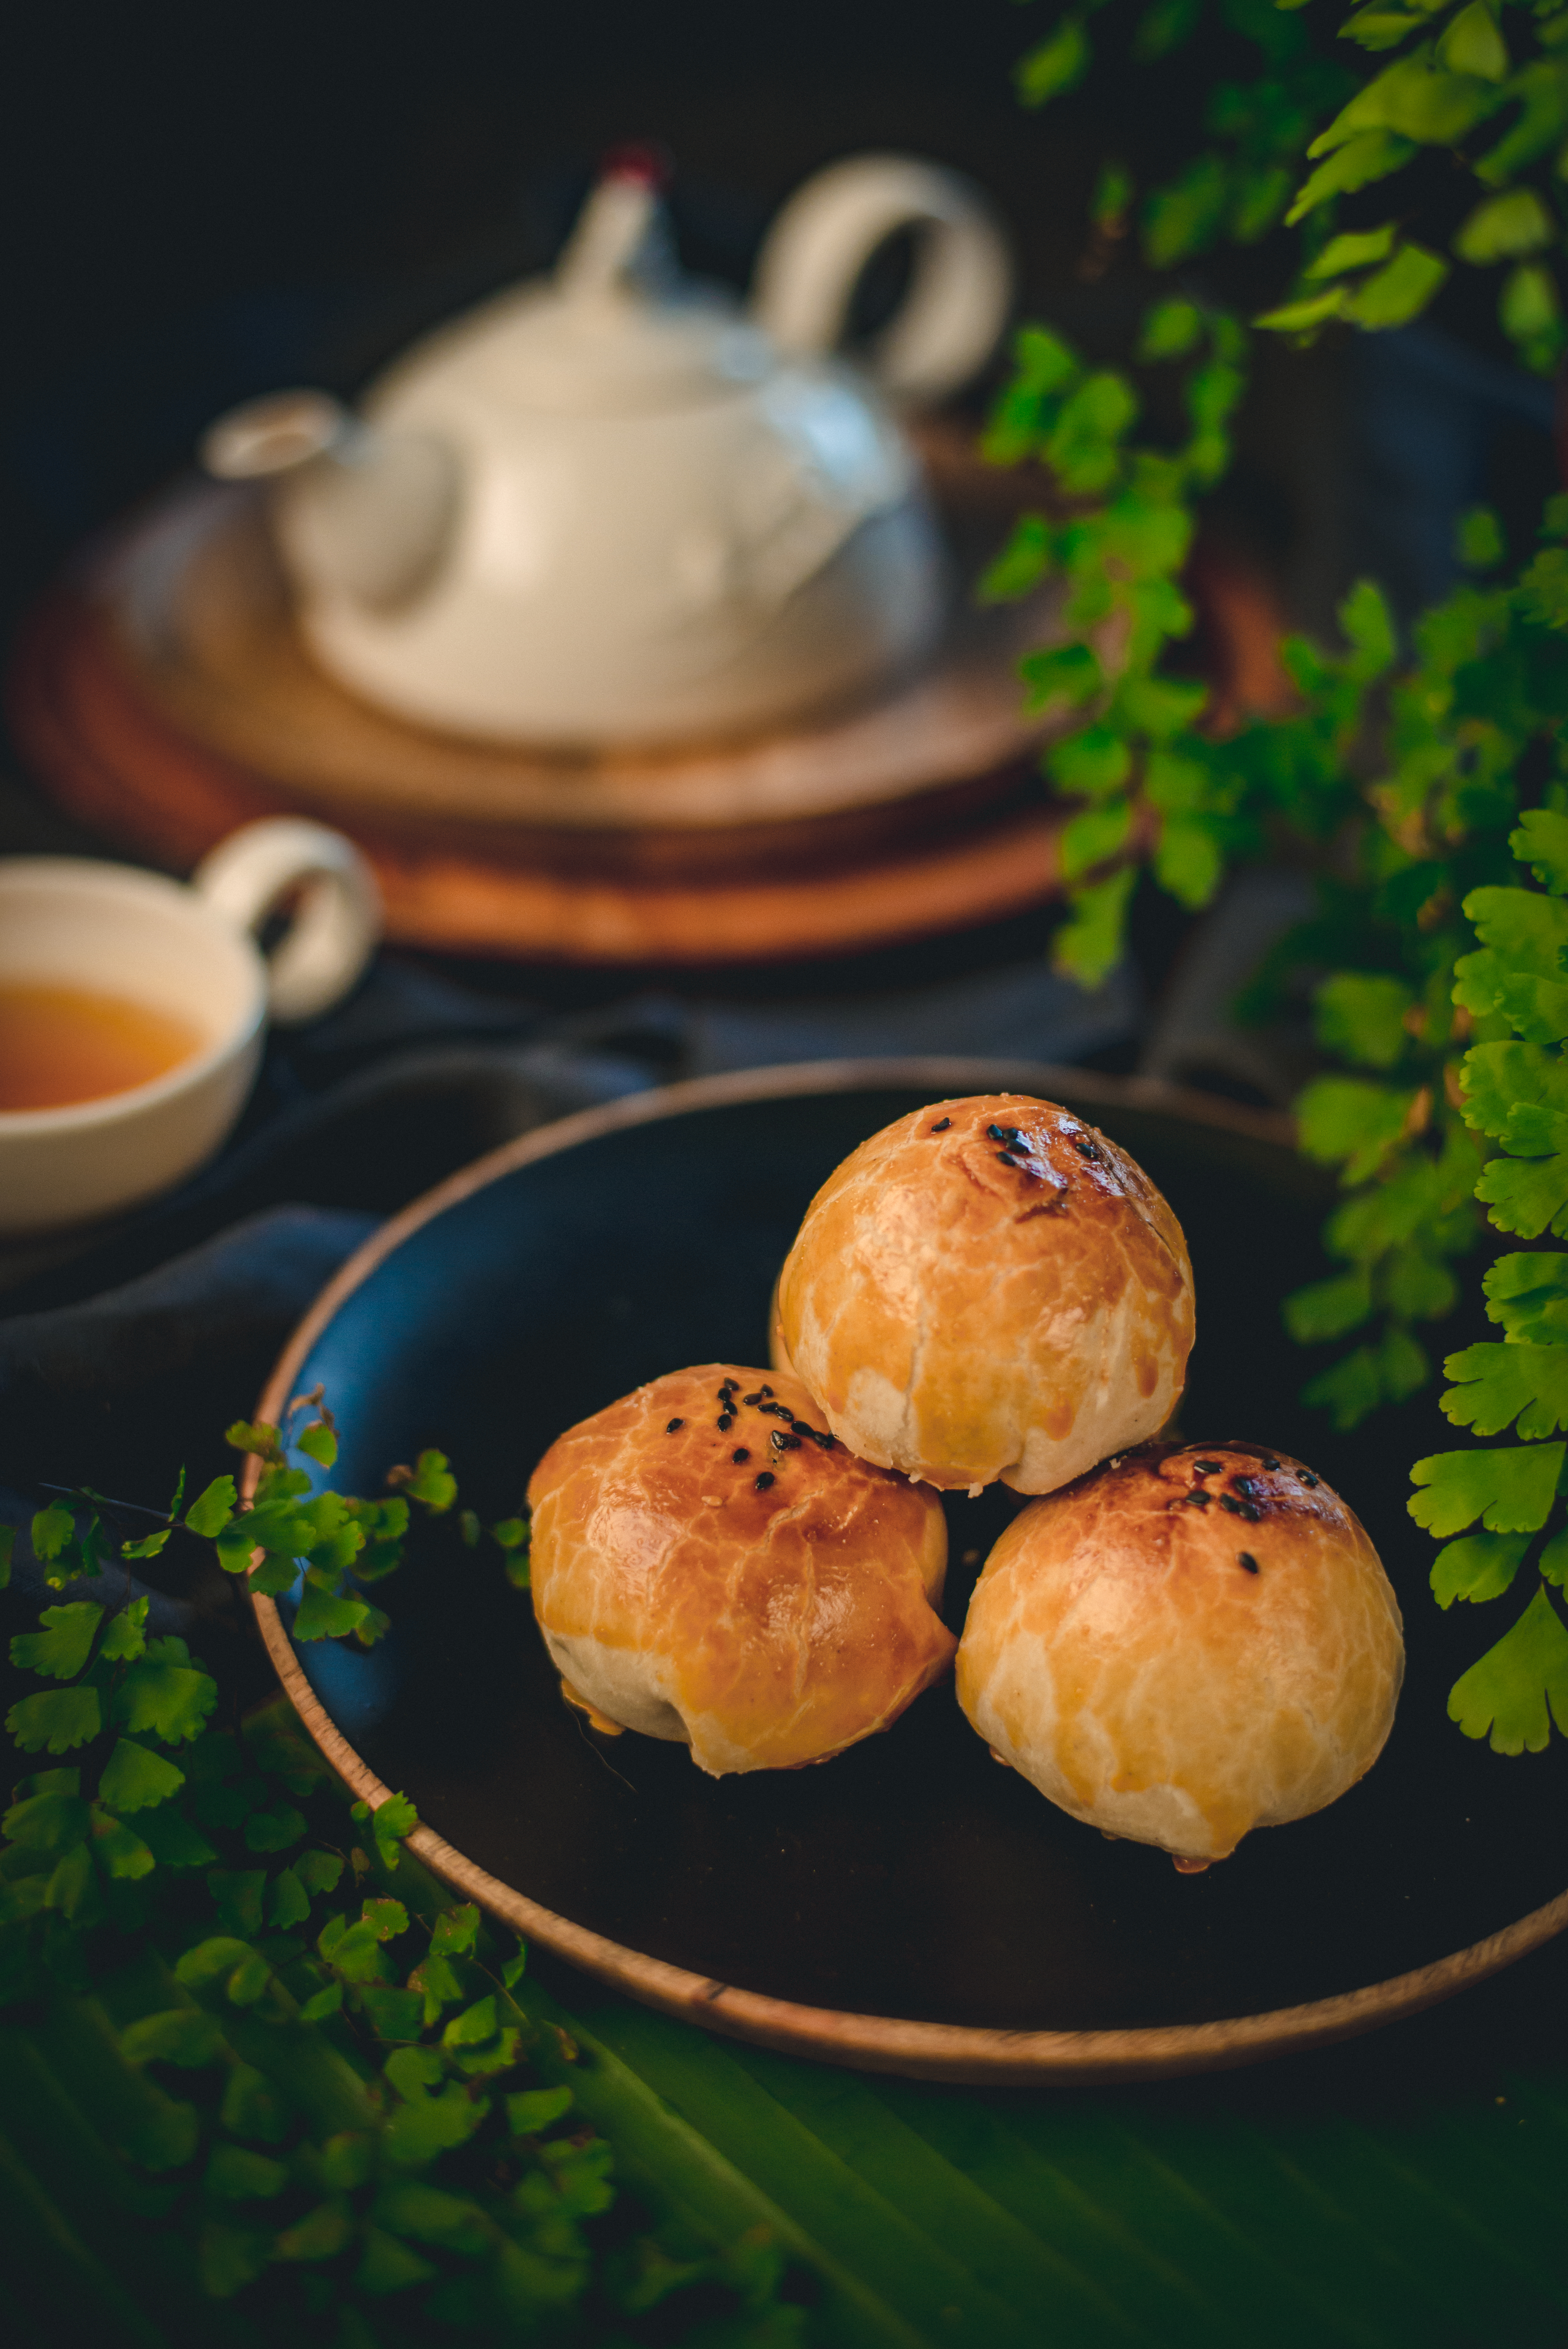
I also made it with red bean and sesame flavor. They all turned out great, and a must-have mooncake of all time in my mind- egg yolk pastry (also use this simplified crust technique), both of us can’t stop having them! It’s festival time, nothing will stop us! hehe

Do you like this recipe? and what’s your favorite flavor of mooncakes? please let me know! Thank you for being here with me!
Happy mid-autumn! 中秋節快樂!Be happy, be safe!
I wish you had enjoyed today’s sharing. follow me @gabbie_arciniegas & @betterthanauthentic on Instagram or sign up the newsletter of the blog! you will get a notification of a new post here!
XO,
Gabrielle


Felicitaciones por este maravilloso trabajo, Gabbie querida! No solo la receta es excelente, sino también las fotografías.
Gracias por animarnos a preparar estas delicias y recordar tu país.
Te amo, la ma
LikeLike
mucha glacias mi ma! te adoro!! ❤
LikeLike